ご質問内容のように、追加用のセルは常にテーブルビューの最後の行に表示される、と言う動作を実現したい場合、それ専用のちょっと特殊な書き方をした方がいい場合があります。
【前提事項】
「リマインダーアプリのように」以外のご指定が無いので、ここでは簡略化した以下のようなクラスがテーブルビュー内の各行に表示されるものとします。
class Item {
    ///チェックされているかどうか
    var isChecked: Bool
    ///表示されるメインのテキスト(簡略化のためサブテキスト等は無いことにする)
    var text: String

    init(text: String, checked: Bool) {
        self.text = text
        self.isChecked = checked
    }
}
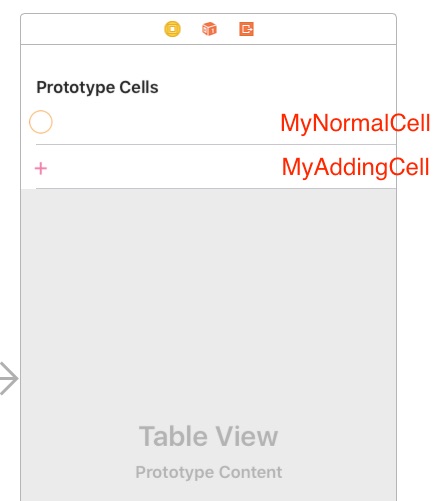
セルの定義は、2種類(通常セルと追加セル)をPrototype Cellに登録し、それぞれにカスタムクラス(MyNormalCellとMyAddingCell)を設定しているものとします。Identifierもクラス名と同じにしてあります。

(UITextFieldを配置したり、そのdelegateをViewControllerに接続したり、といったことは確実にできているものとします。)
このセルを使って、先ほどのItemの配列をテーブルビューに表示する場合、追加セルの表示を気にしなければViewControllerクラスの記述はこんな感じになるでしょう。
class ViewController2: UIViewController, UITableViewDelegate, UITableViewDataSource, UITextFieldDelegate {

    @IBOutlet weak var tableView: UITableView!

    var dataItems: [Item] = [
        Item(text: "A", checked: false),
        Item(text: "B", checked: true),
        Item(text: "C", checked: false)
    ]

    override func viewDidLoad() {
        super.viewDidLoad()
        //UITableViewのdelgate, dataSourceの接続はStoryboardエディター上でも設定できるがわかりにくいのでこちらで
        tableView.delegate = self
        tableView.dataSource = self
    }

    func tableView(_ tableView: UITableView, numberOfRowsInSection section: Int) -> Int {
        return dataItems.count
    }

    func tableView(_ tableView: UITableView, cellForRowAt indexPath: IndexPath) -> UITableViewCell {
        let cell = tableView.dequeueReusableCell(withIdentifier: "MyNormalCell", for: indexPath) as! MyNormalCell
        cell.checkButton.isSelected = dataItems[indexPath.row].isChecked
        //textField.tagの値からindexPath.rowを取得できるようにしておく
        cell.textField.tag = indexPath.row
        cell.textField.text = dataItems[indexPath.row].text
        return cell
    }

    func textFieldShouldReturn(_ textField: UITextField) -> Bool {
        //...
        return true
    }

    //...
}
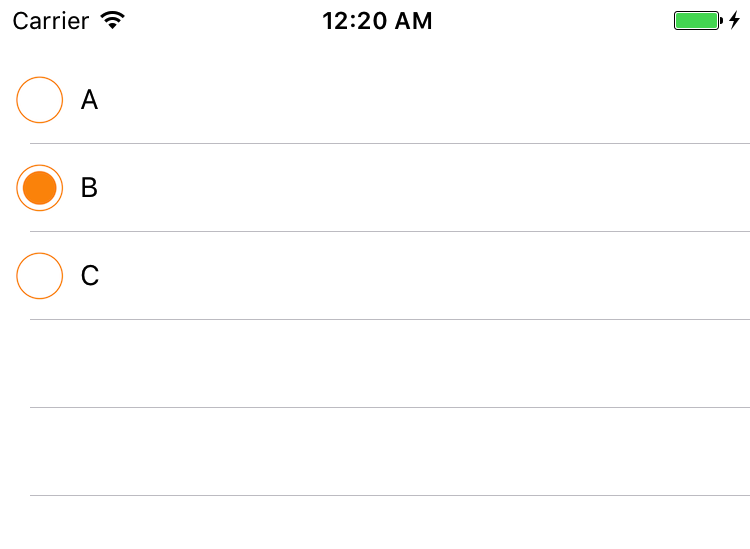
上のコードをそのまま実行すると、こんな感じになります。

【ここから本番】
さて、上記のようなコードでテーブルビューの最後に追加用のセルを表示するにはどうしたら良いかと言うと、ポイントは:
- 行数(numberOfRows)は、(データの個数)+(追加用セルの個数(=1))
- IndexPathが追加用セルを指している場合、MyNormalCellではなく、MyAddingCellを返す
の2点ということになります。
追加用セルが必要であることを示すプロパティhasAddingItemを追加し、UITableViewDataSourceの2つのメソッドを書き直してやります。
var hasAddingItem: Bool = false

func tableView(_ tableView: UITableView, numberOfRowsInSection section: Int) -> Int {
    //hasAddingItemがtrueの場合には、データ数に1足した数を行数とする
    return dataItems.count + (hasAddingItem ? 1 : 0)
}

func tableView(_ tableView: UITableView, cellForRowAt indexPath: IndexPath) -> UITableViewCell {
    if hasAddingItem && indexPath.row == dataItems.count {
        let addingCell = tableView.dequeueReusableCell(withIdentifier: "MyAddingCell", for: indexPath) as! MyAddingCell
        //indexPath.row == dataItems.count、つまりdataItemsの最終要素のindexより1大きな値になっている
        addingCell.textField.tag = indexPath.row
        addingCell.textField.text = ""
        return addingCell
    } else {
        let cell = tableView.dequeueReusableCell(withIdentifier: "MyNormalCell", for: indexPath) as! MyNormalCell
        cell.checkButton.isSelected = dataItems[indexPath.row].isChecked
        //textField.tagの値からindexPath.rowを取得できるようにしておく
        cell.textField.tag = indexPath.row
        cell.textField.text = dataItems[indexPath.row].text
        return cell
    }
}
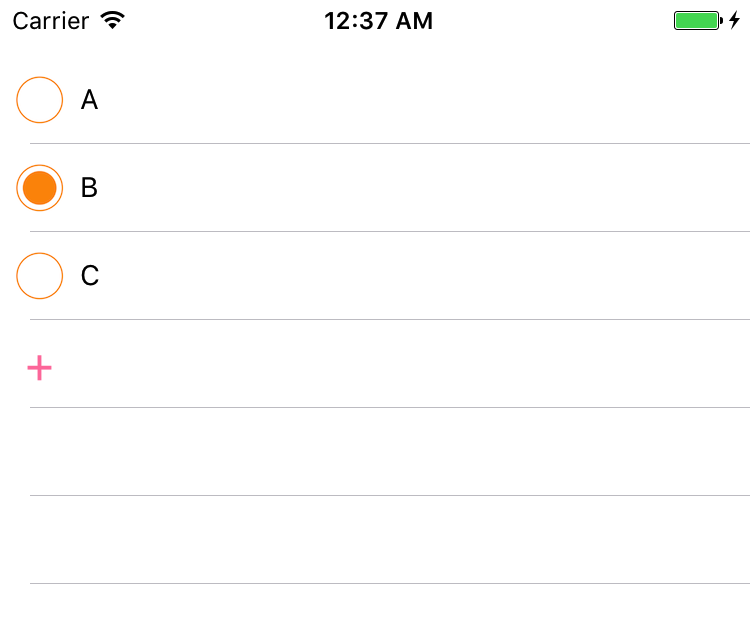
この修正を施したコードをそのまま実行しても、先ほどと実行結果は変わりませんが、追加したプロパティhasAddingItemの初期値をtrueにして実行してやると、こんな結果になります。

と言うわけで、hasAddingItemの初期値としてはfalseにしておいて、適切な契機でその値をtrueにしてやれば、追加用セルの表示が行える、と言うことになります。
但し、
- セルが増えたり減ったりするのはテーブルビュー用データが書き換わったことになるので、
realoadData()が必要
- 普通は追加されたセル上の
UITextFieldにフォーカスが移るはず
といったことも考えておかないといけません。
ざっくり上の2点だけをコードに反映しようと思うと、textFieldShouldReturn(_:)が例えばこんな感じになります。
func textFieldShouldReturn(_ textField: UITextField) -> Bool {
    //tagの値で通常セル上のtextFieldか追加セル用のtextFieldかを区別する
    if textField.tag == dataItems.count {
        //MyAddingCell上のTextFieldの場合の処理
        //dataItemsに追加用セルで編集されていたデータを追加
        dataItems.append(Item(text: textField.text ?? "", checked: false))
    } else {
        //MyNormalCell上のTextFieldの場合の処理
        //追加セルの表示を有りにする
        hasAddingItem = true
    }
    tableView.reloadData()
    //追加セルのIndexPathを作成
    let indexPath = IndexPath(row: dataItems.count, section: 0)
    let addingCell = tableView.cellForRow(at: indexPath) as! MyAddingCell
    addingCell.textField.becomeFirstResponder()
    tableView.scrollToRow(at: indexPath, at: .none, animated: true)
    return true
}
実際のアプリとして考えると、上記のコードだけではまだまだ変な動きをする部分があるのですが、それはまた別件ということで。
ご質問中にコードがほとんど示されていないので、あなたの現在のコードに当てはめるためにどの程度修正が必要かはわからないのですが、考え方はそのまま使えるはずですので、お試しいただければと思います。


